Bathroom Diy Remodel Ideas

Bathroom Diy Remodel Ideas

I'm a compulsive DIY'er, recently I finished another bathroom remodel and have learnt to tile, re-level floors, waterproof and a little bit of carpentry (woodwork / cabinet making). It's amazing what you can learn on youtube 🙂

In this article I'll focus on cosmetic renovations. This is where the bones of the bathroom are left untouched.

1. Bathroom Theme / Style/ Design

The first step is getting a solid design theme & plan. This will help identify what you can keep from your current bathroom. If you're on a tight budget there are some awesome products to refinish and paint tubs, cabinetry and tiles.

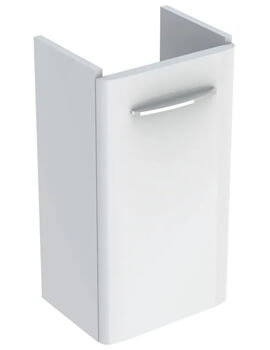
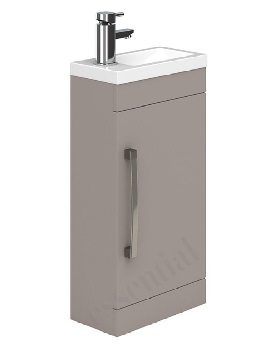
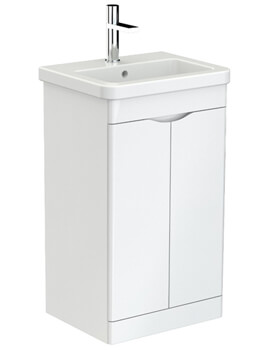
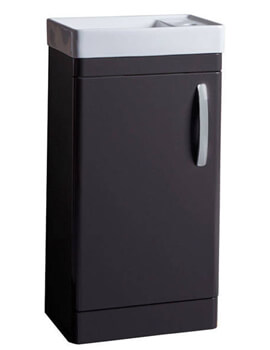
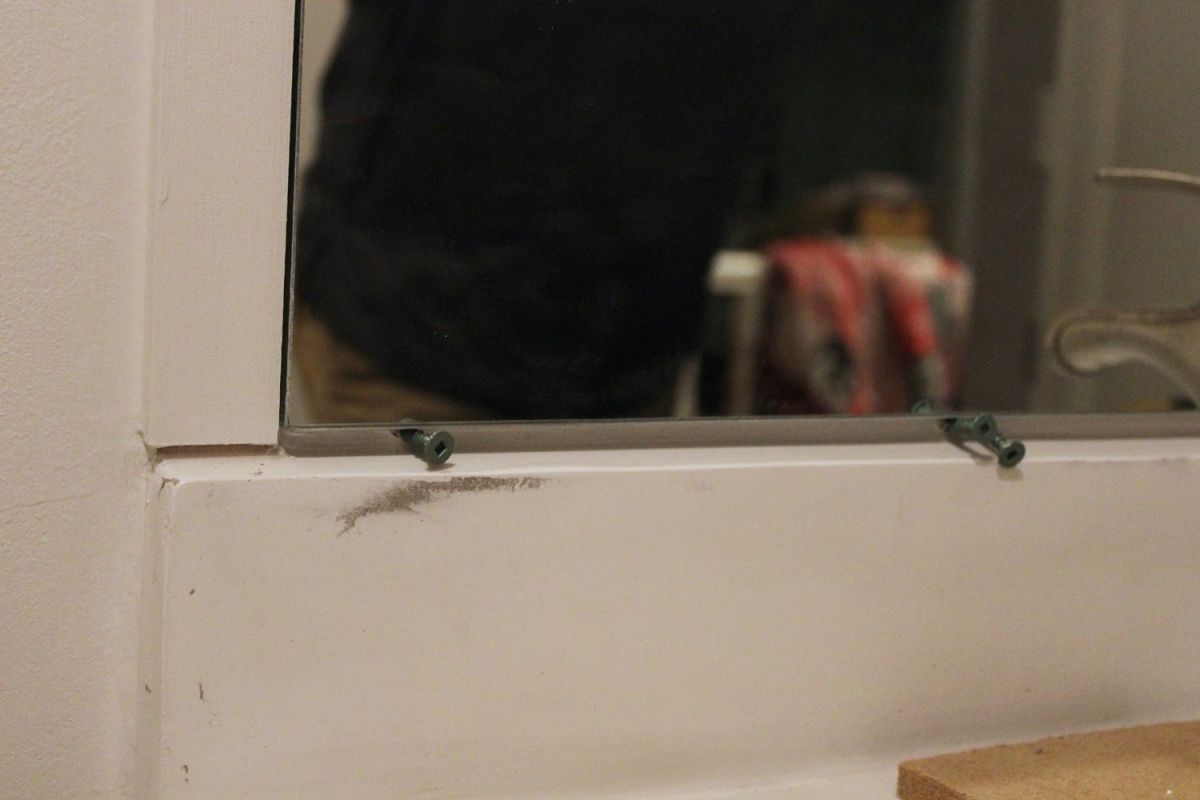
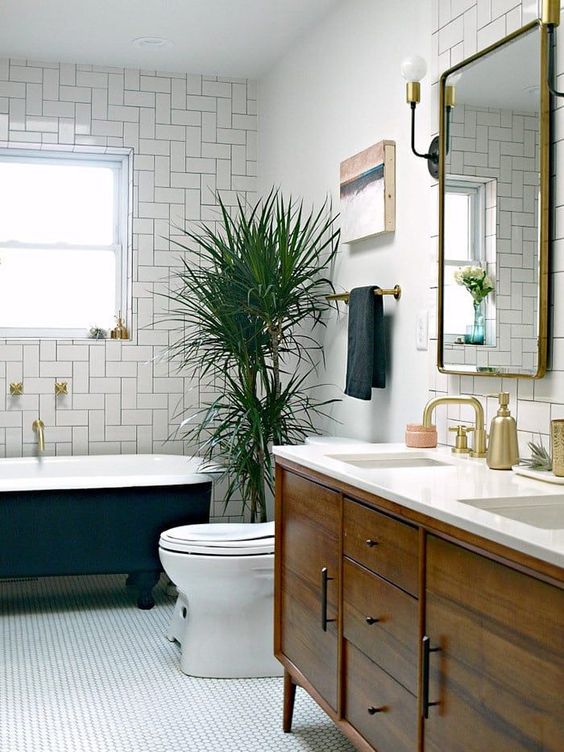
Take a look at this post for some bathroom styling ideas such as trends in mirrors and vanities.

2. Plan the remodel and check if you will need to hire tradies

To plan your trades start by looking at the layout of your bathroom. Good bathroom design and functionality helps sell houses. Keeping the drainage and plumbing in the same position will save you thousands but its worth hiring tradies if the flow of your bathroom doesn't work.

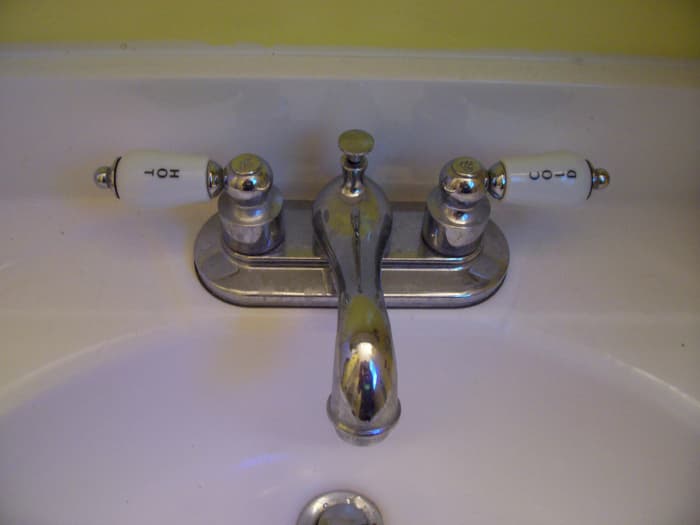
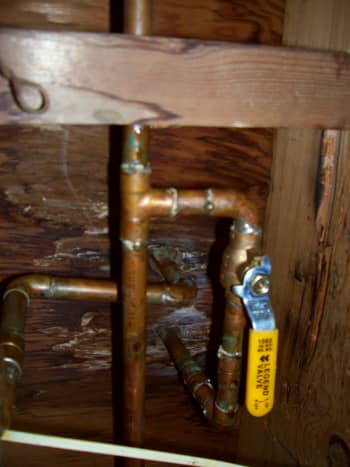
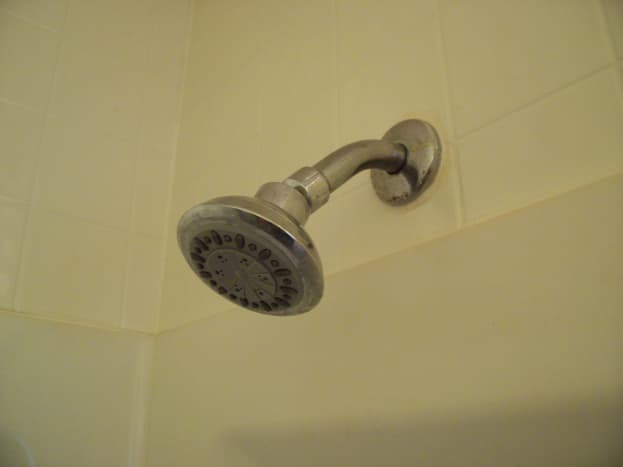
I called in a plumber to make some minor adjustments to the water outlet placements for the shower. On beginning my bathroom renovation I realised my beautiful vintage-industrial style shower required a separate hot & cold water outlets where the taps are.

For DIY plumbing tips this article may be useful. I describe how to change from separate wash basin taps to a single mixer. It's easier than you think!

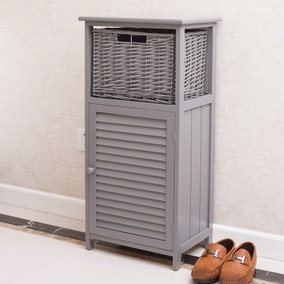
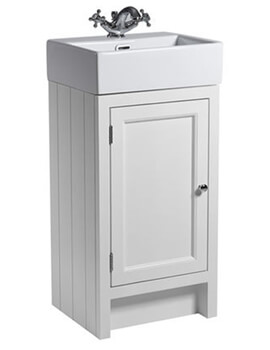
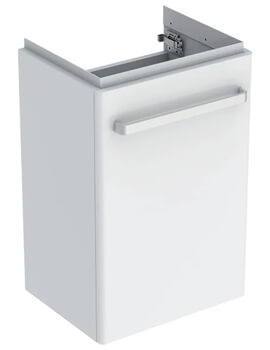
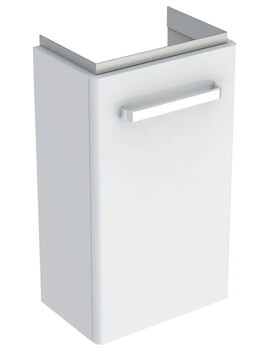
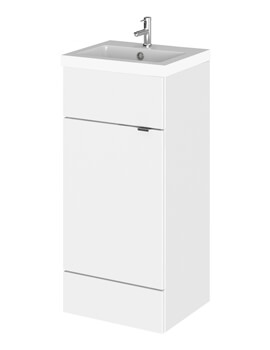
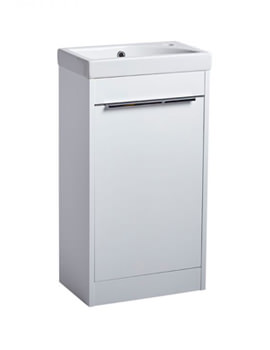
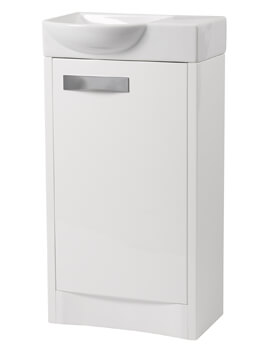
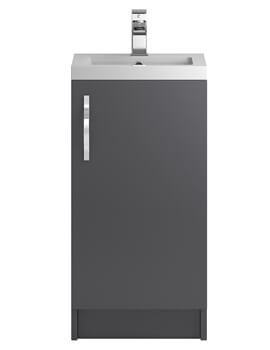
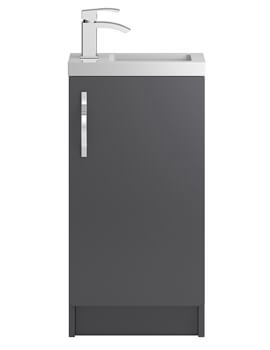
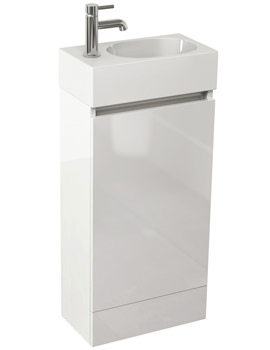
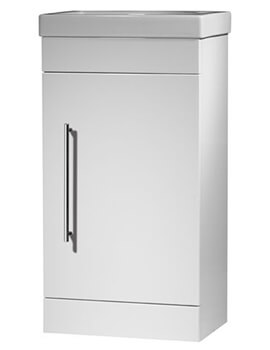
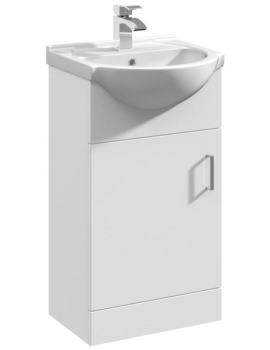
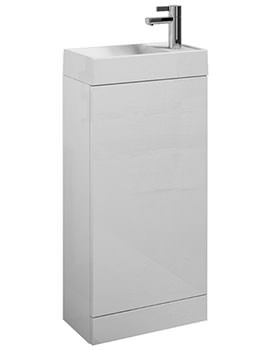
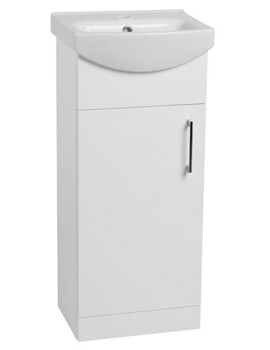
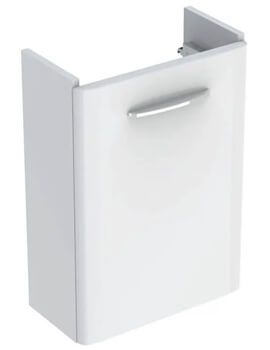
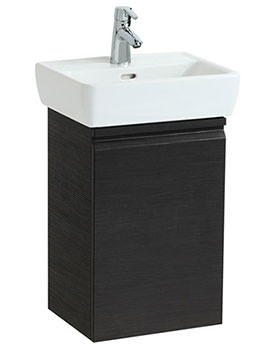
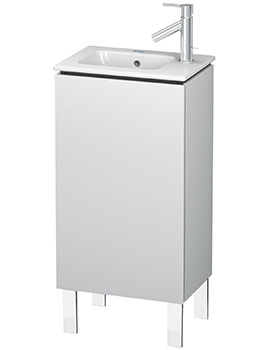
3. Demolition & replacing cabinetry

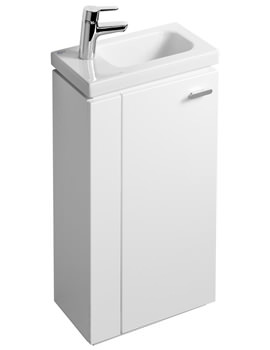
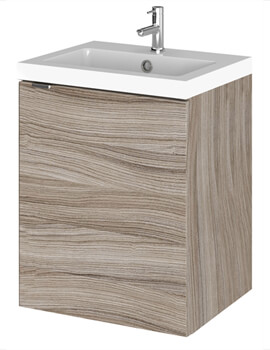
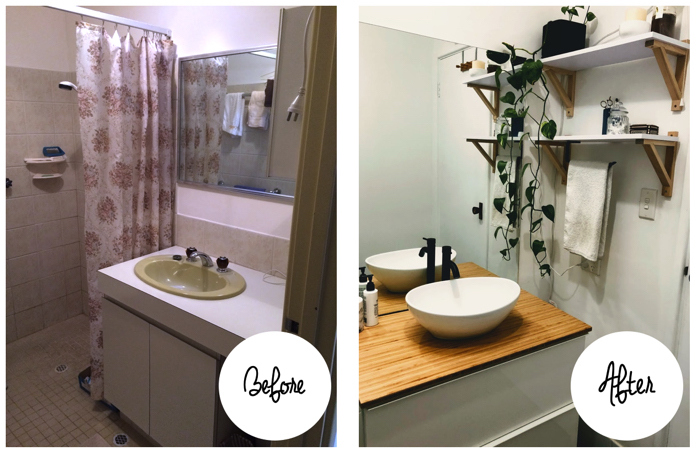
If you have cabinetry thats simple and in good condition then it can be saved but replacing the cabinet and using a modern basin can have a big impact on the overall feel.

cheap diy bathroom remodel
In this remodel I replaced the cabinet with an IKEA cabinet that had better storage because of the large drawers and added open shelving.

Cabinet paint is a durable, low cost way to update and freshen-up cabinets. I've used white, high-gloss cabinet paint in a kitchen renovation and the results were fantastic. The original cabinets were melamine and the bottom edge of the doors were chipped and damaged. My budget and timeline wouldn't accommodate ripping them out and replacing. I used a jigsaw to trim about 1cm off the bottom of the doors, the cabinet doors overlapped the opening so luckily this didn't compromise the overall look.

In my most recent bathroom makeover I saved on renovating costs by upcycling a cabinet. I bought it second hand for $40 and made curvy mid-century style legs. I had also looked at buying stylish furniture legs online such as these but wanted to create something unique.  I also sanded back and stained the cabinet with mahogany wood stain then finished with a high gloss varnish.

Above bench basins are really popular right now but don't make the mistake I made and use a high edge basin on a standard height bench-top. I feel like I need a stepping stool to wash my hands!

4. Painting tiles

I have used White knight tile paint previously that has worked out well but preparation is key!

  1. First clean the tiles well, but to be honest, when you are sanding back the tiles and grout a lot of this surface gets removed anyway.
  2. Sand the tiles. This step is crucial in making the paint stick. If you have smooth glossy tiles and your sand papering efforts fail to roughen up the surface then you're bound for disappointment. I plan to write an in depth article on this with my experiences and while tools worked the best for me, stayed tuned and I'll link it here when published.
  3. Clean the tiles again, removing any dust, soap residue or other contaminants. If there is any spots where mould has been growing, treat them with bleach.
  4. Apply the primer. Stir the tile priming paint well before using. Paint the corners first with a paint brush (cutting in) then coat the remainder with a small paint roller. For cutting in I always use a tapered brush like this. Most brands require 4 hours dry time before applying the colour coat.
  5. Apply the top coat. To ensure an even cover apply the first coat in a horizontal pattern with the roller then the second coat in a vertical direction.
painting bathroom tiles before and after
Painted Bathroom Tiles Before and After

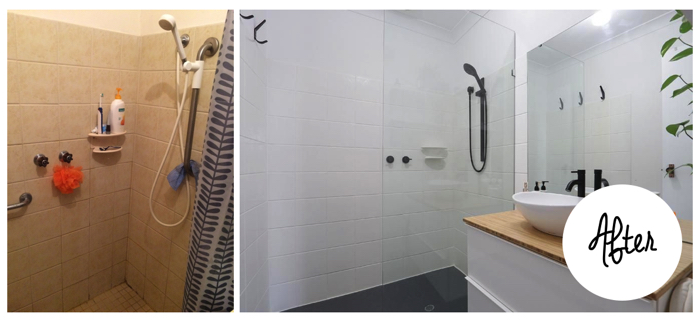
In the above bathroom I painted the floor tiles, this worked well because the floor tiles were textured. I would not recommend painting smooth, glossy floor tiles as I just dont think the paint will adhere well enough to the surface to last constant traffic.

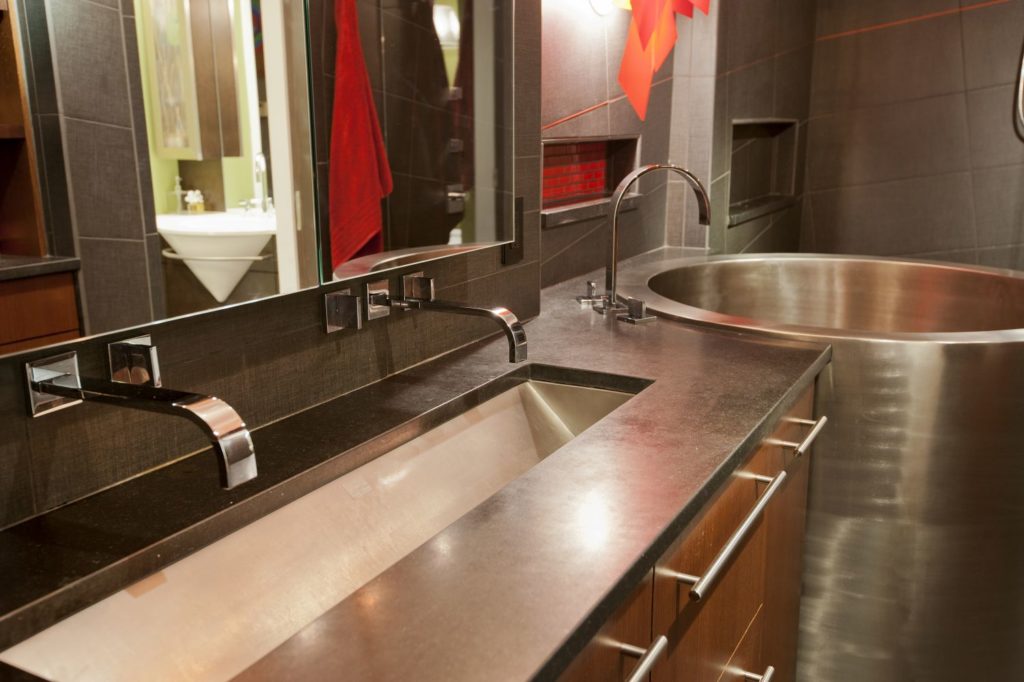
5. Replace taps and faucets

After the tiles are painted and the cabinets have been replaced or painted its time to update the taps & faucets. Step away from traditional chrome and consider 'old-gold' shades of brass or rose gold. Black tap-ware is going out of style but considering how easy it is to change taps & faucets, there is no harm in going with this trend until you get sick of it! Just choose the shower faucet with caution,  if the shower outlets need to be tailored to the tap-ware then it will be a pain to fix as the tiles will need to be removed for a plumber to change the layout of the pipes.

6. Painting the bathroom walls & ceiling

What kind of paint should you use in a bathroom?

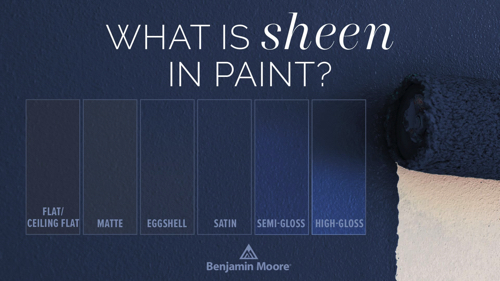
The bathroom is a high humidity environment so it's important to use paint that suites the conditions. Paints with a higher sheen are easier to clean and remove mould or staining for high humidity environments such as bathrooms.

The image below shows the finish or levels of sheen in paint. Flat paint has no shine, it has an even matt finish and absorbs rather than reflects light. When you run your hands over a flat painted finish it feels slightly rough and textured compared to a smooth gloss paint. Matte, eggshell, satin, semi-gloss and high gloss have increasing levels of sheen and durability.

what kind of paint should i use in a bathroom

What paint to use on bathroom walls?

Use a eggshell or satin finish paint for bathroom walls as this is more durable than lower sheen paints. The more textured (lower sheen) the paint, the more it will tend to trap moisture and tend to stain.

Note: If your bathroom has mould or damp issue then it's vital to improve the ventilation with a good exhaust fan. This is inexpensive and help reduce the humidity and prevent mould.

What paint to use on the bathroom ceiling?

Matt paint is the standard for ceilings in all areas of the house except the bathroom. In most rooms there is no need for the durability of glossier paints and a flat finish will help light spread evenly throughout the space without reflecting or creating glare. However, for bathroom paint longevity, select a paint finish that has a slight sheen such as satin finish or eggshell as the humidity can lead to staining of the paint.

If you do choose a flat/ matt finish it just means you may have to re-paint the ceiling in a few years to keep the space looking fresh. As a DIYer, painting ceilings is one of my least favourite jobs so in my opinion its best to use the most durable products from the beginning.

7. Finishing touches for your bathroom remodel

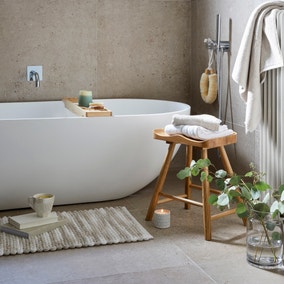
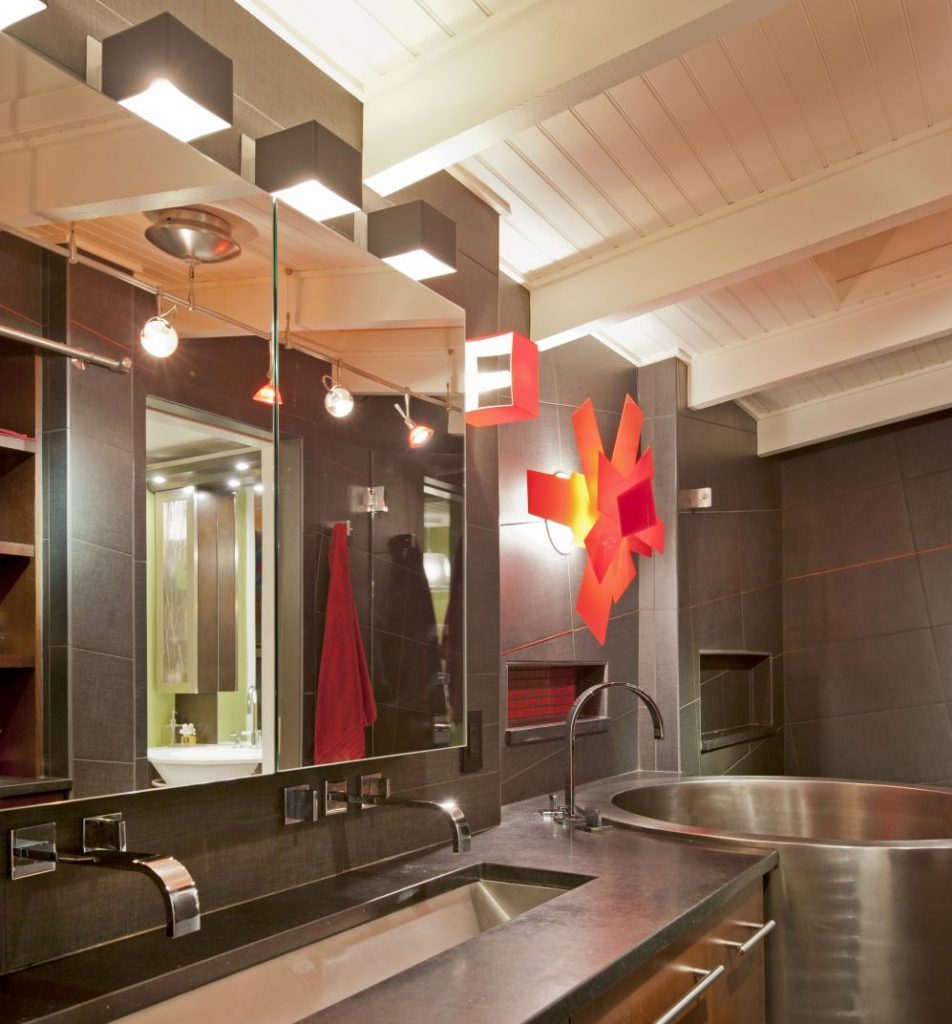
You've done all the hard work, and now it's time for the fun part. Decorating involves all the non-permanent touches like mirrors, plants, artwork and beautiful things! Make sure each piece ties in with your original vision and in small spaces keep the decor functional to prevent clutter.

Bathroom decorating tips

  1. Find a unique container for organising toothbrushes, lotions and potions
  2. Light the mirror with pendants for effective task lighting. Take a look at this post for more on the 3 types of lighting.
  3. Dont forget the floor, for an eclectic theme try a vintage Turkish rug, for a beachy / coastal style try a floor mat in a natural jute or if you've gone Hamptons look for shades of blue and interesting patterns.
  4. Towel racks. Instead of going for a basic towel rail consider a towel ladder or if space is limited, interesting industrial looking towel hooks.
  5. Shelving. To keep surfaces clutter free install open shelves with stylish boxes and containers to keep hairdryers, straighteners and annoying cords out of sight.
diy bathroom updates
DIY Bathroom update tip ; use pendant lights for effective task lighting at the bathroom mirror.

Bathroom Diy Remodel Ideas

Source: https://homedecordesigns.info/bathroom-ideas-diy-bathroom-remodeling/

Share:

Bathroom Side Stand

Bathroom Side Stand

Bathroom Furniture And Storage

Loxwood Stool Oak

Grey Storage Unit

Bathroom Storage Furniture

Here at Dunelm, we understand the importance of a tidy space when it comes to maintaining a relaxing atmosphere in your bathroom . After all, when you're relaxing after a long day, who wants to spend time in clutter?. With this in mind, we offer an extensive range of fixed and free standing bathroom storage furniture including bathroom cabinets, bathroom drawers, and bathroom storage units to help keep your essentials organised and your surfaces clear.

Tuck your lotions and potions out of sight with our range of wooden bathroom cabinets and bathroom drawers. Whilst our plain wood cabinets will bring a touch of charm to your home, our white free standing bathroom cabinets benefit from a fresh painted finish that will blend unobtrusively with most decors. Some of our most popular bathroom storage units come in natural wood, white, and grey.

Our mirrored cabinets also double as a handy reflective surface in which to check your appearance as you brush your hair or wash your face, making the most from your bathroom storage. A corner bathroom storage unit or cabinet can work well in smaller bathrooms, and a narrow storage cabinet is equally effective when space is at a premium.

When it comes to bathroom towel storage, our bathroom drawers offer the perfect space for folded towels, keeping them close at hand for immediate use. For a rustic twist, our wicker drawers will make a stylish statement whilst also providing room for fresh towels and a variety of other bathroom products. For smaller bathrooms, our tall and slim bathroom storage units units present a useful storage solution without taking up excessive amounts of space.

For a small toilet or shower room, you'll need something a bit more compact, that's why we also stock a range of small bathroom storage units as well as under sink storage and vanity units. Don't forget to check out our range of hooks, caddies and accessories too!

Browse our full range to find beautiful bathroom furniture to suit you and your home.

Bathroom Side Stand

Source: https://www.dunelm.com/category/home-and-furniture/bathroom/bathroom-furniture-and-storage

Share:

Replace Water Supply Line Bathroom Sink

Replace Water Supply Line Bathroom Sink

Dan has been in the HVAC industry for 23 years with experience ranging from installation and service to sales and distribution.

Need to replace a leaky sink or shower faucet? Here's an easy repair guide to get the job done inexpensively and a quick tip to quiet the noise from a dripping faucet until you can make that repair.

The Deafening Sound of a Leaky Faucet

You're laying in bed when you decide to kill the lights, turn off the TV and turn in for the night. It's not too long before you notice the "drip, drip, drip" noise coming from the bathroom. You try to ignore it..."drip, drip". You cover your head with the pillow but the sound just keeps getting louder and louder..."DRIP, DRIP". You can hardly hear yourself think and up you go to see what you can do to make it stop!

I know. It sounds a lot like "Tell-Tale Heart" but you have to admit, it can seem that way when the faucet starts to leak. Perhaps you're better at tuning things like this out than I am but for me, it was the shower fixture and trying to ignore it was nearly impossible.

Well, I have some good news. Fixing that pesky drip can be quite simple and even better, may only cost you a couple of dollars. Let me show you how.

Simple 2 handle bathroom faucet.

Simple 2 handle bathroom faucet.

Finding the Right Replacement Faucet Cartridge

The first thing you'll want to do is to find the proper replacement part for your leaking faucet. Knowing the model of faucet you have can often help to find a replacement before you start the repair but if you don't have that information, remove the problem part and take it with you to the store to match it up with a universal replacement part. In this example, the leaking bathroom sink problem will be a bad cartridge located in the faucet handle.

NOTE: Cartridges may be specific to the hot and cold sides of the faucet. Make sure you get the right one.

How to Repair a Leaky Faucet, Step by Step

  1. Turn off the water supply to the sink. Usually, there will be a shut off under the sink but if not, locate the main valve in the water line and shut it down from there.
  2. Next, remove the cap on the handle of the faucet. Some may vary a bit but here you can see it's quite easy to locate and remove.
  3. Now that the cap is off, remove the screw that is holding the handle in place and lift the handle off the faucet.
  4. Then, remove the beauty ring if you have one. If there is a hex top on the beauty ring, you should be fine to just loosen it with a wrench. If not, place a rag around the ring before wrenching on it to avoid damaging the finish.
  5. Lastly, remove the cartridge. It should wiggle out fairly easily with your hand.
  6. Replace the cartridge. Be sure that it is seated so that the handle turns off and on properly before putting it all back together again. Otherwise, your handle may turn to the wrong positions from where it was before. Many of these cartridges are finicky this way but simple to figure out.
  7. Enjoy! You'll sleep like a baby without that annoying drip and it only took a couple of dollars and a few minutes of your time.

Let's move on to that shower. It's slightly different but just as simple with a couple minor, potential differences.

Photo Guide for Faucet Repairs

This is a quarter turn valve. When turned a quarter of a circle, the water is off/on. You may have a smaller chrome style of this under your sink that will work just as well.

This is a quarter turn valve. When turned a quarter of a circle, the water is off/on. You may have a smaller chrome style of this under your sink that will work just as well.

Make sure you're using a quality Teflon tape for this job since the chances are you won't be wanting to disassemble your faucet anytime soon. I've been using this Everflow Teflon tape for years with very good results. It sticks and seals very well.

Replacing a Faucet Washer

Replacing a faucet washer is just as easy as the cartridge and even less expensive. Here, we will be repairing a leaky shower faucet but the method would be the same if your sink has this sort of washer as opposed to a cartridge as we've seen above.

NOTE: You want to be sure you buy the right size washer replacement. When in doubt, remove the old one and take it to the store with you to match it up with a new one.

How to Repair a Leaky Shower Faucet, Step by Step

  1. Turn off the water supply to the shower. This may be in an access panel on the wall behind the shower or you may have to shut off the main line as shown above.
  2. Remove the cap on the end of the handle.
  3. Remove the screw holding the handle on. This again will likely be a Philips screw.
  4. Now, remove the beauty ring if you have one to expose the valve stem. Again, be careful of your finish and use a rag to protect the piece.
  5. Remove the valve stem. This stem should have a hex area for you to place your pliers (channel locks) and grab hold tightly.
  6. Remove the screw that is holding the rubber washer onto the end of the valve and remove the old washer.
  7. Put the new washer in place and secure it back down with the screw you just removed.
  8. Apply Teflon tape to the threads that you will be screwing back into the fixture.
  9. Put the faucet back together in the same way you'd removed it.

Photo Guide for Repairing a Leaky Shower Faucet

If the drip is here...

How to Stop the Noise of a Leaking Faucet

Okay so I'm aware this may not be something you're going to do right away but I do have a tip to offer to at least cure the noise that annoys you. Tie a string from the dripping faucet to the base where the water lands.

The water will now run quietly down the string to the basin and never will a "blip" be heard. This will also show you how rusty the water is since the string will begin to "brown" from the water. This may tell you that it's time to flush that water tank.

The Benefits of Fixing a Leaky Faucet

Aside from not having to listen to that "drip, drip, drip" all night long, there are other benefits from taking care of this problem.

  • Money - A leaking faucet does cost money. Depending on the severity of the leak, it may not be much but it will pay for those washers you bought. If it's bad, it could be noticeable in your water bill.
  • Water stains and deposits - This slow leak can increase the rate of which deposits build up on the filter in the faucet, thus blocking up the flow of water or consistency of the stream. It can also cause staining around the drain.
  • Mold growth - If there is a faucet leaking that isn't used regularly, mold will eventually begin to grow in the sink where the water is being splashed too. This light mist of water makes a damp surface where mold can begin to grow and once it establishes a foothold, it will grow quite rapidly from there and now we're talking about bad smells and potential health concerns.

Sink Aerators / Faucet Screen

Easy to Do Yourself

This is definitely one of those repairs you don't want to have to pay large sums of money to have done. With a couple of simple household tools and a few dollars for a replacement part, you can fix this problem easily and in just a few minutes. The repairs shown to the shower and faucet in this hub took a total of 20 minutes to do both. For even the less mechanically inclined, this is a repair that takes just minutes.

Read More From Dengarden

Of course, as always, when in doubt don't guess. Guessing at a household repair can cause further damage and end up costing more money than is necessary. Never force something to fit or use parts that are not meant for the repair.

Happy plumbing and sleep easy with that annoying sound in the past.

Need More Plumbing Tips?

  • Unclogging a Sink Drain in the Bathroom or Elsewhere
    Learn how to get rid of that standing water in your sink. Liquid drain cleaners don't always work and it requires a bit more effort but knowing how you can do this yourself can save you big money.
  • Anyone Can Fix A Leaking Water Pipe Fast and Easy Us...
    Burst a water line? Need to add a water line? No problem. See how you can do it yourself fast, easy and much cheaper than calling a plumber. It really is a snap! No soldering needed!

This article is accurate and true to the best of the author's knowledge. Content is for informational or entertainment purposes only and does not substitute for personal counsel or professional advice in business, financial, legal, or technical matters.

© 2012 Dan Reed

Becky H on August 23, 2020:

I'm having a heck of a time trying to get the stems out of my bathtub faucet, it's an American standard I'm pretty sure. Whoever put it in must have been very confident it would never have to be worked on bcoz they made the holes for the pipes to go through exactly big enough to fit the pipes through. I can't get any kind of a tool in to the hex nuts to remove the stems from either side. And I'm not sure what I can do to make room for a toil without wrecking the faucet. Do you have any advice? Thank you.

Pat Derks on April 29, 2019:

What if you didveverthing right and the faucet still drips?

David from Idaho on June 28, 2012:

We live out in the country and have a well, with plenty of hard water. Our faucets don't last too long out here but I'll save your info when I have to change out the parts on the tub.

Voted up and useful

Rhys Baker from Peterborough, UK on June 25, 2012:

I love the step-by-step photo procedures: it really makes this hub! Sound, practical and useful advice. Voted up!

Dan Reed (author) on June 24, 2012:

@ All my HubScribers - Thank you. I'm glad these hubs are helpful. That is 100% my aim when I write these. Help people understand their homes so they can either repair it themselves or have a good understanding so they know what is they are being told by their service providers. Thank you all for stopping by and your very kind comments.

summerberrie on June 23, 2012:

Cre8tor, your hubs are so useful. I am going to bookmark them all!!! What a talent for making something frustrating seem easy and doable. Your writing and illustrations almost make me want a dripping faucet so I can fix it.

Marcy Goodfleisch from Planet Earth on June 23, 2012:

I think your entire collection of hubs was designed to help me with my home maintenance! I have one of the double sinks in my master bath turned off due to a persistent drip, and I just replaced (courtesy of my son's skill at plumbing) the faucet in my kitchen. If we don't fix leaks right away, they cause considerable damage, and they also waste far more water than we realize. Voted up and up, and shared!

healthyjoe from Melbourne Australia on June 22, 2012:

Some articles are most informative, although I know how to change a cartridge (tap washer). Done many in my time, no i am not a plumber.

Dan Reed (author) on June 22, 2012:

My new invention...."The Drip Trip". It's a string in a bag. I'll be rich!

Robie Benve from Ohio on June 22, 2012:

Great information! I have a leaky faucet, but since it does not drip gallons a day and can not be heard from the bedroom, I've let it be. Calling a plumber for something that small may not be worth the cost... but let me share this with my hubby and see if he's in the mood for some DIY. :)

alliemacb from Scotland on June 22, 2012:

This is such a useful hub. My dad taught me how to fix a dripping tap before I left home but I hadn't heard the string idea before - very handy.

Yvonne Spence from UK on June 22, 2012:

We had a tap (UK for faucet) that dripped for months and 2 plumbers said it couldn't be fixed - I can't remember why but something to do with its position in the middle of the bath. However, somehow my husband (who is not a plumber) managed to fix it. I have a feeling this hub would have come in handy for getting it fixed a lot sooner.

Nettlemere from Burnley, Lancashire, UK on June 22, 2012:

That string tip is really neat and definitely the way to go. I declare that all baths and sinks should have a piece of string hanging ready for emergency purposes!

Replace Water Supply Line Bathroom Sink

Source: https://dengarden.com/home-improvement/How-to-Fix-a-Leaky-Faucet-or-Dripping-Shower

Share:

Small Bathroom Vanity Cabinets

Small Bathroom Vanity Cabinets

Nuie Vault 400mm Single Door Floor Standing Unit With Basin - Image

Shipping: £29.95

QUICK VIEW

Availability: 5-7 Working Days Approx

Nuie Checkers 460mm Floor Standing Cabinet And Basin - Image

Shipping: £29.95

QUICK VIEW

Availability: 5-7 Working Days Approx

Tavistock Lansdown 400mm Cloakroom Unit And Basin - Image

Shipping: £29.95

QUICK VIEW

Availability: 3 Working Days Approx

Nuie Sienna 420mm Floor Standing Cabinet And Basin - Image

Shipping: £29.95

QUICK VIEW

Availability: 5-7 Working Days Approx

Nuie Cloakroom 480mm Floor Standing Cabinet With Basin - Image

Shipping: £29.95

QUICK VIEW

Availability: 5-7 Working Days Approx

Roper Rhodes Hampton 410mm Wide Cloakroom Unit - Image

Shipping: £29.95

QUICK VIEW

Availability: 5 Working Days Approx

Geberit Selnova Compact One Door Cabinet And Service Space - Image

Shipping: £29.95

QUICK VIEW

Availability: 6 Working Days Approx

Geberit Selnova 348 x 252mm Compact Small Projection 1 Door Cabinet - Image

Shipping: £29.95

QUICK VIEW

Availability: 6 Working Days Approx

Hudson Reed Fusion 400mm Full Depth Floor-Standing Vanity Unit And Basin - Image

Shipping: £29.95

QUICK VIEW

Availability: 5-7 Working Days Approx

Tavistock Sequence 450mm White Finish Vanity Unit And Basin - Image

Shipping: £29.95

QUICK VIEW

Availability: 5 Working Days Approx

Roper Rhodes Mia 450mm White Single Door Freestanding Unit With Basin - Image

Shipping: £29.95

QUICK VIEW

Availability: 5-7 Working Days Approx

Hudson Reed Apollo 405x 360mm Floor-Standing Full Depth Cabinet And Basin - Image

Shipping: £29.95

QUICK VIEW

Availability: 5-7 Working Days Approx

Hudson Reed Apollo Slimline 405 x 260mm Floor-Standing Compact Cabinet And Basin - Image

Shipping: £29.95

QUICK VIEW

Availability: 5-7 Working Days Approx

Hudson Reed Fusion 400mm Floor-Standing Slimline Vanity Unit And Basin - Image

Shipping: £29.95

QUICK VIEW

Availability: 5-7 Working Days Approx

Imex Echo White Gloss Single Door Floor Standing Unit And Basin - Image

Shipping: £29.95

QUICK VIEW

Availability: 5 Working Days Approx

Roper Rhodes Esta 450mm Wide Freestanding Unit - Image

Shipping: £29.95

QUICK VIEW

Availability: 5 Working Days Approx

RAK Resort Wall Hung 450mm Wide Cloakroom Vanity Unit With Basin - Image

Shipping: £29.95

QUICK VIEW

Availability: 3 Working Days Approx

Nuie Mayford 450mm Floor Standing Cabinet With Basin - Image

Shipping: £29.95

QUICK VIEW

Availability: 5-7 Working Days Approx

Saneux Quadro Floor Mounted Gloss White Unit With Basin - Image

Shipping: £29.95

QUICK VIEW

Availability: 5-7 Working Days Approx

Geberit Selnova Square 303 x 254mm Single Door Cabinet - Image

Shipping: £29.95

QUICK VIEW

Availability: 6 Working Days Approx

Essential Nevada Single Door Vanity Unit And Basin - 400mm Width - Image

Shipping: £29.95

QUICK VIEW

Availability: 5-7 Working Days Approx

Saneux Indigo Floor Standing 2 Door Unit - Image

Shipping: £29.95

QUICK VIEW

Availability: 5-7 Working Days Approx

Tavistock Compass 455mm Cloakroom Unit And Basin - Image

Shipping: £29.95

QUICK VIEW

Availability: 2-3 Working Days Approx

Tavistock Opal 400mm Gloss White Freestanding Single Door Unit With Ceramic Basin - Image

Shipping: £29.95

QUICK VIEW

Availability: 5 Working Days Approx

Geberit Selnova Square 396 x 226mm Small Projection One Door Cabinet - Image

Shipping: £29.95

QUICK VIEW

Availability: 6 Working Days Approx

Laufen Pro 380mm Single Door Wall Hung Vanity Unit - Image

Shipping: £29.95

QUICK VIEW

Availability: 5 Working Days Approx

Duravit L-Cube 420mm Floor Standing 1 Door Vanity Unit For Me By Starck Basin - Image

Shipping: £29.95

QUICK VIEW

Availability: 14-21 Working Days Approx

Essential Alaska 1 Door Vanity Unit 450mm And Basin - Image

Shipping: £29.95

QUICK VIEW

Availability: 3-4 Working Days Approx

Duravit Brioso Wall Mounted 434mm Wide 1 Door Vanity Unit For Vero Air Basin - Image

Shipping: £29.95

QUICK VIEW

Availability: 14-21 Working Days Approx

Duravit Ketho 400mm Single Door Wall Mounted Vanity Unit For D-Code Basin - Image

Shipping: £29.95

QUICK VIEW

Availability: 10-14 Working Days Approx

Ideal Standards Concept Space 450mm Floor Standing Unit With Guest Washbasin - Image

Shipping: Free

QUICK VIEW

Availability: 5 Working Days Approx

Hudson Reed Fusion 400mm Wall Hung Full Depth Vanity Unit And Basin - Image

Shipping: £29.95

QUICK VIEW

Availability: 5-7 Working Days Approx

Kartell K-Vit Purity Floor Standing 400mm Cloakroom Vanity Unit With Basin - Image

Shipping: £29.95

QUICK VIEW

Availability: 2-3 Working Days Approx

Small Bathroom Vanity Cabinets

Source: https://www.qssupplies.co.uk/Bathroom-Furniture/Small_Vanity_units/Product/470.htm

Share:

How To Get Mold Off Bathroom Caulking

How To Get Mold Off Bathroom Caulking

  • Bathroom

How to Caulk a Bathtub

If the caulk around your tub is peeling, damaged, or stained, it's time to remove it and start over. Here's how to get the job done right.

How to Caulk a Bathtub

Photo: shutterstock.com

What can I use to remove caulk from around the bathtub? Also, what is the correct product to use when I caulk the tub again? Obviously, I need something waterproof, but ideally I'd like the caulk not to be plainly visible.

Removing caulk isn't difficult, only time-consuming. The name of the game is perseverance, particularly if you are dealing with several layers that were applied in succession over time. Given the nature of the task, it's important to arm yourself with the right tools, starting with a utility knife and a razor scraper, both fitted with new blades. If you'll be tackling a wall-to-tub joint, opt for a church key can opener or a pointed scraper; either can be handy if you need to go digging for any stubborn remnants. Then again, you might get lucky—sometimes after loosening one end, a strand of caulk pulls away easily. Much depends on the age and quality of the installation.

Related: Top Tips for Refinishing a Bathtub

To begin, hold the utility knife so that it's more or less perpendicular to the joint, then run the blade along the caulk joint. If the caulking proves too hard to slice, try softening it with a heat gun (do this carefully). Now remove whatever caulk you are able to cut free. Follow with a razor scraper. Wielded at a shallow angle in relation to the surface, the razor should remove any caulk bits still stuck to the tiles or tub. If you find evidence of mildew, thoroughly scrub the area with full-strength vinegar.

Compared with the hassle of removing caulk, replacing it is a cakewalk; even a complete novice can apply a fresh bead of caulk to a bathtub. Just remember to use a caulking product specially formulated for use in kitchens and baths (packages are clearly marked). Caulk comes in many colors, but if you don't want to see it, choose a clear variety. Before you begin, steady the nozzle of the caulking tube about 1/8 inch away from the surface and at a 30-degree angle.

As you work, try to force any excess caulk into the joint; failing that, wipe the caulk onto a towel you've kept at the ready. Clean any caulk you misapply before it has the chance to harden. Finally, slide your wetted finger along the joint once more. Doing so eliminates any imperfections in the bead, ensuring a smooth finish.

How To Get Mold Off Bathroom Caulking

Source: https://www.bobvila.com/articles/how-to-caulk-a-bathtub/

Share:

Bathroom Remodeling Reading Ma

Bathroom Remodeling Reading Ma

Bathroom Remodeling in North Reading, Massachusetts

New Hampshire bathroom remodel with large his and hers sink

Are you looking to remodel your bathroom in the North Reading area?

Over the years, the team at Blackdog Design/Build/Remodel has provided residents with unparalleled bathroom renovation and design services. We look forward to serving you and your home with a respect to your functional and aesthetic design needs.

To schedule bathroom remodeling services in North Reading, contact Blackdog Design/Build/Remodel today!

Our Bathroom Remodelers Service Bathrooms of All Sizes!

Whether you would like to renovate a small bathroom or remodel your entire master suite, we have the services and experience to make your vision successful. If you want to get started planning your ideal bathroom remodel, our designers are happy to get in touch with you.

Schedule bathroom remodeling services in North Reading today!

Top Benefits of Remodeling Your Bathroom

If you are considering a bathroom remodel for your home, you may be looking to solve a number of issues, and quickly. After all, the dynamic of your entire family can benefit from bathroom remodeling services!

A bathroom remodel can provide the following benefits:

  • Increase your home's overall value
  • Add room and space for your growing family
  • Upgrade outdated bathroom designs
  • Prepare your home for safe and comfortable aging in place
  • Improve your day-to-day quality of life

No one likes a cramped, cluttered, or stuffy bathroom. In fact, hardly anyone enjoys sharing a bathroom—especially if it lacks space.

At Blackdog Design/Build/Remodel, we believe you shouldn't have to compromise your lifestyle inside your home. When it comes to functional and aesthetically beautiful bathroom design, you can count on our remodelers in North Reading to get the job done on time, on budget, and with as little stress or mess as possible!

Request a consultation for bathroom remodeling services in North Reading today!

Our Bathroom Remodeling Process in North Reading

bathroom remodel featuring vanity

From selecting custom cabinet styles to choosing bathroom tile or reworking your floorplan, our bathroom remodeling experts will work with you on all aspects around bathroom design, product selection, and our unique bathroom remodeling process.

By taking the time to discuss your needs and your budget, our bathroom design and remodeling team is able to get to know you, your style, and your goals for your bathroom remodeling project.

From start to finish, Blackdog will assist you in selecting the finishes, creating the most functional layout, and giving you the best possible experience while living through a remodel.

Contact us today or view our bathroom remodeling portfolio!

Choose Blackdog for Bathroom Remodeling in North Reading

When Blackdog is on your team, you can spend your days patiently daydreaming about laying in your new soaker tub instead of worrying about when your bathroom remodel will be completed. We know how important bathrooms are in a household, and we work quickly and effectively to provide you with a beautiful new renovation.

We strive to offer professional, beautiful, and practical bathroom remodeling services to homeowners in North Reading because we want to make your home a comfortable place for you and any visitors you may have.

Blackdog Design/Build/Remodel has been providing home and bathroom design, build, and remodeling services since 1989. At that time, we created a customer-centric mission that still holds true today.

For all of your bathroom remodeling needs in the North Reading area, schedule a consultation online today!

Bathroom Remodeling Reading Ma

Source: https://www.blackdogbuilders.com/bathroom-remodeling-in-north-reading

Share:

How To Hang Large Bathroom Mirror

How To Hang Large Bathroom Mirror

We've all seen the builder-grade bathroom wall mirrors, held up gracelessly by those small but ugly clear plastic clips. While there are tricks to hiding those plastic clips, this tutorial addresses the original issue: hanging a frameless bathroom mirror like the professionals, without the use of anything visually distracting.

It's a simple process, although it does require some serious muscle power (depending on the size of your mirror) and precision-heavy patience.  So, learn how to install a bathroom mirror with these easy steps.

DIY Prof Install Mirror for Bathroom View in gallery

DIY Prof Install Mirror before and after View in gallery

What you Need to Install a Bathroom Mirror

  • Frameless mirror
  • Trims
  • Mirror mastic
  • measuring tape

This method, of hanging a large bathroom vanity mirror the way the professionals do it, will have a fantastic impact on your entire bathroom, no matter its size or style. Notice how the "before" space appears small and rather dingy, largely due to an undersized (translation: pathetic) mirror? A new ceiling-height mirror changes the impact of that very same space dramatically…even if you're wearing old jeans and a hoodie.

How to Install a Bathroom Mirror: Step by Step

DIY Prof Install Mirror - experience View in gallery

Step One: Make a plan before you install a bathroom mirror

Before you begin your mirror-mounting experience, we need to discuss the actual mirror you choose. I highly recommend having a mirror custom-cut for your space for several reasons.

First, a bathroom vanity will generally have a light mounted somewhere above the vanity, typically a foot or two below your ceiling (or at least partway up). This severely limits your options for a large, beautiful, light-bouncing-around-the-bathroom mirror.

Secondly, a custom-fit mirror can accommodate odd proportions and obstacles (such as a light) and looks built-in. Thirdly, built-in things always look more expensive and sophisticated.

accurate measurements View in gallery

The key, however, is to produce impeccably accurate measurements to the professional mirror cutters. (Check out your local glass retailers to do this for you.)My mirror ended up being almost 3' wide by almost 4-1/2' tall.

Remove lighting fixtures View in gallery

To produce accurate measurements, remove the light fixture (if applicable) to find and measure the electrical box underneath. Most glass cutters can cut a precise 4" round hole out of the center of a mirror, which happens to be the exact size of a typical electrical box. In other words, there's no room for error, so you need access to the box directly.

DIY Prof Install Mirror - plan View in gallery

Step Two: Measure where you want to install the bathroom mirror

Measure both ends of each horizontal and vertical space – the bottom and top widths, the left and right heights, and the distance from the center of your lighting box to all four sides of your space. The reason these measurements are so important is because your space, in an old house at least, might not be perfectly square.

That was the case with mine. I was recommended to subtract at least 1/2" total from the smallest width and height measurement to be sure the mirror fit. I measured about four times and, confident in the numbers' accuracy and wanting a seamless mirror fit, ended up subtracting only 3/8". Make a detailed writeup of your measurements and talk to your mirror-cutting professionals for the final decisions.

DIY Prof Install Mirror - cut mirror View in gallery

Step Three: Always dry fit before you install a bathroom mirror

One you receive your perfectly cut mirror, you need to do a dry fit into your space to make sure it fits impeccably. Depending on its size, the mirror can be quite heavy and awkward; however, DO NOT SKIP THE DRY-FIT STEP. It is critical for a quality, professional end result. Your life will be easier with two (or three) strong adults ready to help. So lift the mirror into place.

DIY Prof Install Mirror- box screw View in gallery

Step Four: Double check cut outs in bathroom mirror

With the mirror in place (it fit beautifully! What a nerve-wracking few minutes I spent, wondering if it would fit!), you need to verify several different aspects. First and foremost, if your mirror has a cutout for a lighting fixture's electrical, make sure the screw holes are both visible and accessible. Your cutout is worthless for a lighting fixture if this is not the case.

DIY Prof Install Mirror - details View in gallery

Step Five: Make adjustments before you install a bathroom mirror

With the cutout aligned, still holding the mirror up for a dry fit (this is awkward and where multiple people's help comes in handy), check to see what tendencies the mirror has when it's up against the wall. For example, it might want to tilt one direction more than the other.

It might slide or stick or have a hard time lying flat. Noticing and noting these tendencies is important here, because you can prepare for them before it's crunch time (and/or too late) with the mirror mastic.

DIY Prof Install Mirror - dry fit View in gallery

Also during this dry fit, still making sure the cutout is aligned and the mirror is positioned straight and centered, mark with a pencil any lines (above, below, and/or on the sides of your mirror) that will be helpful to quickly position the mirror during mounting.

With the mastic applied, you probably won't have a lot of time to make huge adjustments or measurements, so get all the positioning and marking done beforehand.

DIY Prof Install Mirror - heavy mirror View in gallery

Tip for Installing a Bathroom Mirror

I know the mirror is heavy at this point, but double-check all the corners and sides one final time during this dry fit, looking for anything that stands out oddly. Particularly if you have to adjust one side (keeping the cutout centered), you'll need to check the other three again for squareness.

DIY Prof Install Mirror- cut View in gallery

Step Six: Install bathroom mirror with mastic

With your dry fit complete and your mirror's precise destination marked on the wall, it's time to put the mastic onto the back of your mirror. This is really the most important component when installing a bathroom mirror as far as the actual successful mounting of the mirror.

Rather than make a guess in the mastic section of my local hardware store, I talked with the glass-cutting professionals who cut my mirror for me, and I bought this mastic that they use for all of their mirror installation jobs. It is heavy duty, durable, and strong.

DIY Prof Install Mirror- food wide View in gallery

Use Circles with the Mastic

Every 8" or so along the top of your mirror, "draw" a circle with your mastic. For a nearly 3-foot-wide mirror, this meant four circles along the top. Tip: Keep your circles at least 3" away from the edge to prevent any mastic oozing out; nothing kills a floating mirror installation like some ugly brown mastic ooze.

Tip: Our mastic tube tip was cut too far away from the actual tip, making the mastic come out too thick. In retrospect, the thickness of the mastic strands should have been about half what they are in this photo.

make a swirling flower-type shape View in gallery

Keeping about 3" away from the cutout opening, make a swirling flower-type shape around the cutout itself. This spot requires extra mastic to really hold it in place and strengthen its bond to the wall to help support the added weight of a light fixture.

Again, take care to keep the mastic far enough away from the cutout edge so mastic doesn't leak out and accidentally cover or interfere with the electrical box.

Keep applying circles of mastic View in gallery

Keep applying circles of mastic every 8"-10" or so, keeping in mind that the top of your mirror requires slightly more mastic than the bottom. Due to the thickness of this mastic application, our mirror took much longer to mount than it should have, which meant a lot of heavy, hard lifting and holding precisely in place.

Learn from what I say here and not necessarily what this photo shows you – trust the mastic's inherent holding power, and keep the applied strands thinner.

mastic applied View in gallery

Step Seven: Press the bathroom mirror firmly

With mastic applied onto the back of the mirror, push your mirror precisely into position on your wall. Press it firmly against the wall for as long as it takes for the mirror to stay in place.

DIY Prof Install Mirror- more mastic View in gallery

Another Tip When Your Install a Bathroom Mirror

(An idea for you if you do like we did and applied too much mastic so that the mirror holding requirements exceeded our strength and endurance capacities: carefully place some temporary screws into wall studs under the mirror to help hold it up.

Be extremely careful not to catch the threads on your mirror itself, as this could torque and crack your mirror. Sadness. Hopefully, however, you won't need to resort to this drastic action due to the appropriate application of mastic amounts in the first place.)

DIY Prof Install Mirror- holding mastic View in gallery

Keep a constant eye, as you're holding your mastic-backed mirror in place, on the cutout over the electrical box. Make sure the mirror doesn't slide discreetly and slowly down over the screw holes.

DIY Prof Install Mirror- wall battens View in gallery

Bathroom Mirror Framing

The wall battens provide the mirror's side "frames" in this case. So, I avoided installing the final batten until the mirror was in place so as to keep the connection tight. Installing a batten at this point also helped to keep the mirror from its tendency to clockwise tilt that, you'll remember, we observed during the dry fit.

DIY Prof Install Mirror- center View in gallery

Let the mastic cure thoroughly as per product instructions and your gut feeling. Walk by the room often to admire the newfound amounts of light and spaciousness.

DIY Prof Install Mirror- mastic is curing View in gallery

Step Seven: Prep nail holes around bathroom mirror

While the mastic is curing, you could take advantage of the required wait time. Fill in the brad nail holes and paint your newly installed batten piece, if applicable.

DIY Prof Install Mirror - before and after View in gallery

Let's take a minute to remember where we came from. We can adequately appreciate the new mirror arrangement now. The difference in perception of space, light, and sophistication is amazing with a new bathroom mirror.

DIY Prof Install Mirror Project View in gallery

My favorite aspect of installing this bathroom mirror is the ceiling-height feature. The entire bathroom renovation emphasizes the vertical. So, it only makes sense that the bathroom mirror should reflect that as well. (Pun absolutely intended.) Originally, I had planned on framing out this bathroom mirror, but I prefer the simple seamlessness of the mirror tucked away in its custom nook. Now it's time to mount the light over the mirror!

How To Hang Large Bathroom Mirror

Source: https://www.homedit.com/install-a-bathroom-mirror/

Share:
banner